Terrace renovation part 2 - Resurrection
Note: This post is a part of my story about house renovation.
You can read the part 1 terrace renovation article too.
It Starts To Look Good
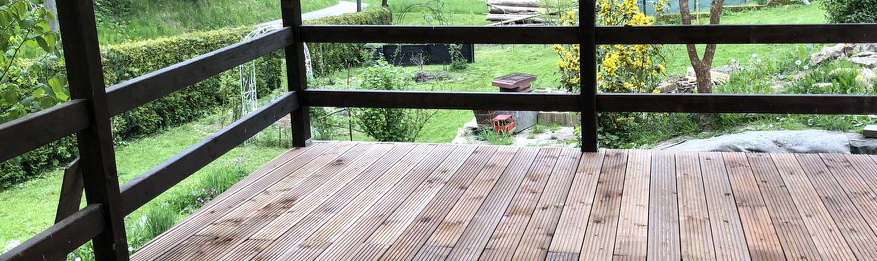
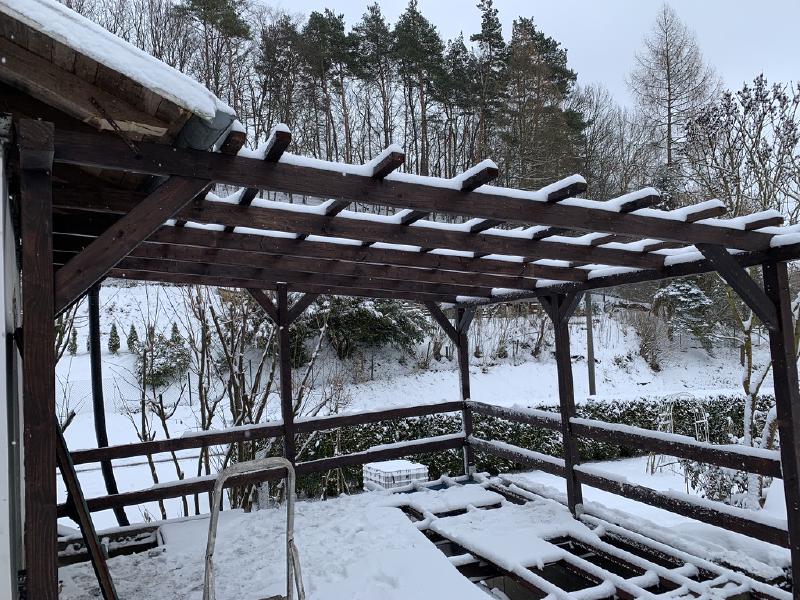
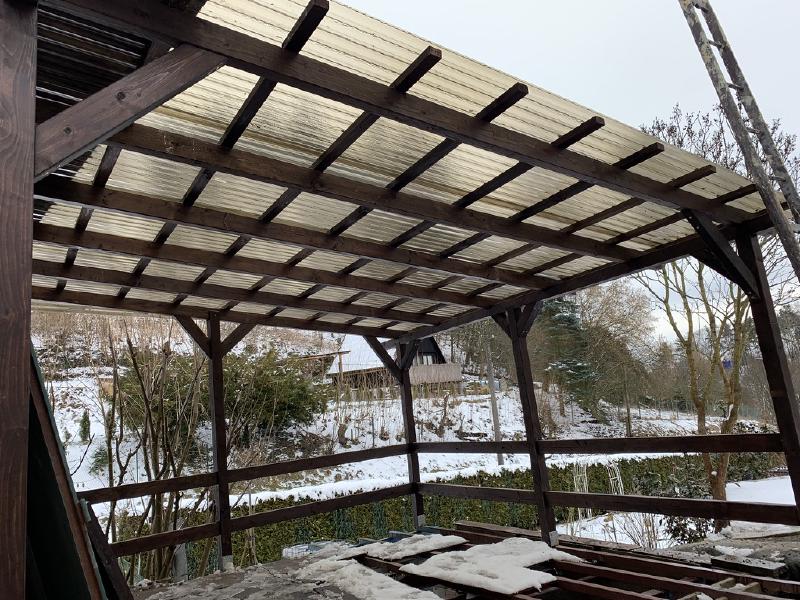
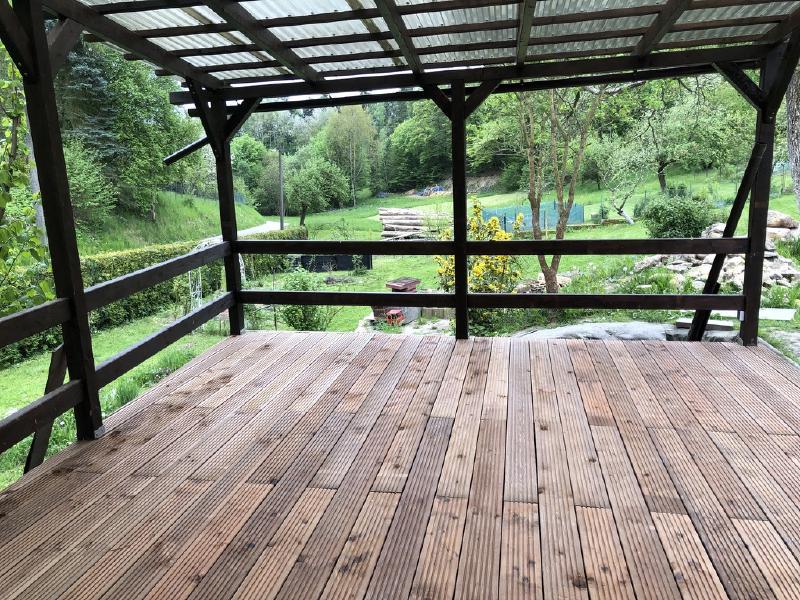
After some months of over-the-weekends work and much money spent on wood, screws, power tools and other building materials, the thing is starting to get pretty real! Here I proudly present you the current before-and-after photos.

It finally looks like something usable, but this is still work in progress. I need to fix the plastering around the entrance to the future outdoor kitchen, I want to mount the wood fencing pickets, so kids do not fall down, since the terrace is 1.5 meters above ground level on the other side. Some fancy solar-powered LED lights and the water mist system for summer days is a must too. So much good stuff to come yet!
How Did I Do It?
No post on this page should serve as a tutorial, because that’s a lot of work to prepare. So as you can see, I use the approach of showing the cool stuff, so you know how handy I am 🤣.
Structure
I wanted to avoid mistakes of my predecessor, so I wanted the supporting structure not to fall itself apart over time.
Plus, of course, I wanted it to be super tough, so it does not fall apart when the terrace will be full of people 😁.
I started the terrace job around August 2022.
New Base + Supporting Wall
First step was to make concrete base for the new supporting walls. So I needed to buy concrete mixer, study how to do lots of DIY concrete (never did it before), and then I did the 80 cm deep concrete base for supporting wall that I build later. Unfortunately, not many photos from this step are available. But you have to trust me, that it was about 2000 litres of concrete poured into the ground. yay!
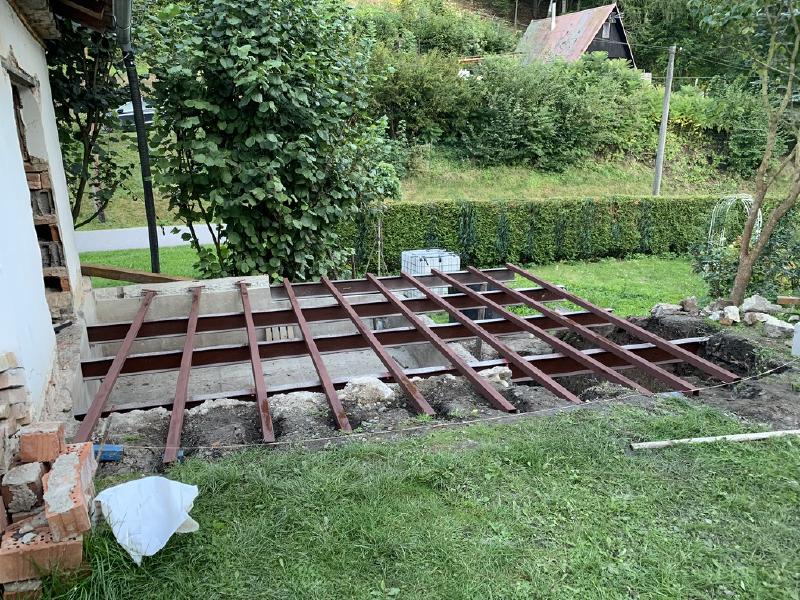
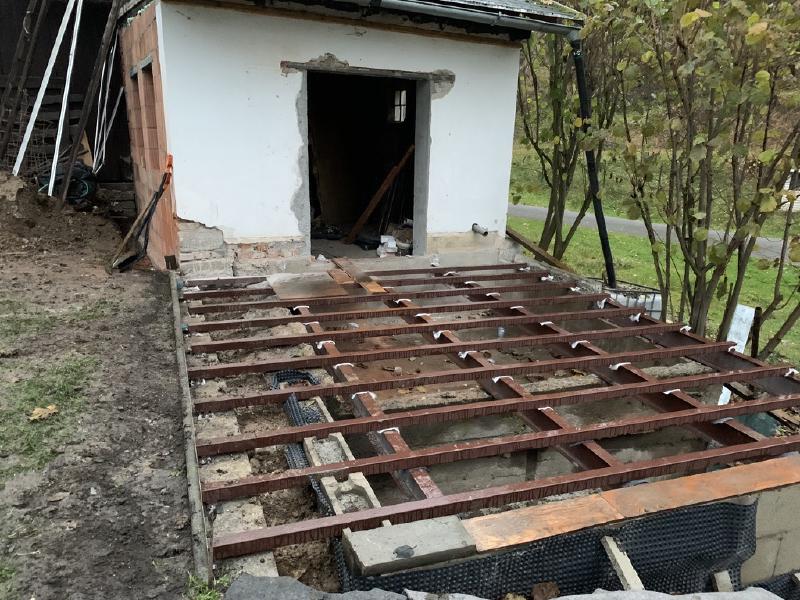
Steel Frame
Second step was to build the steel frame. Some super thick steel beams were already there, but I still needed to source another thick one and then many of the thinner ones, to be able to do this steel “grid/matrix”, which will act as a support for wooden beams that will (finally) be base for mounting the terrace planks.
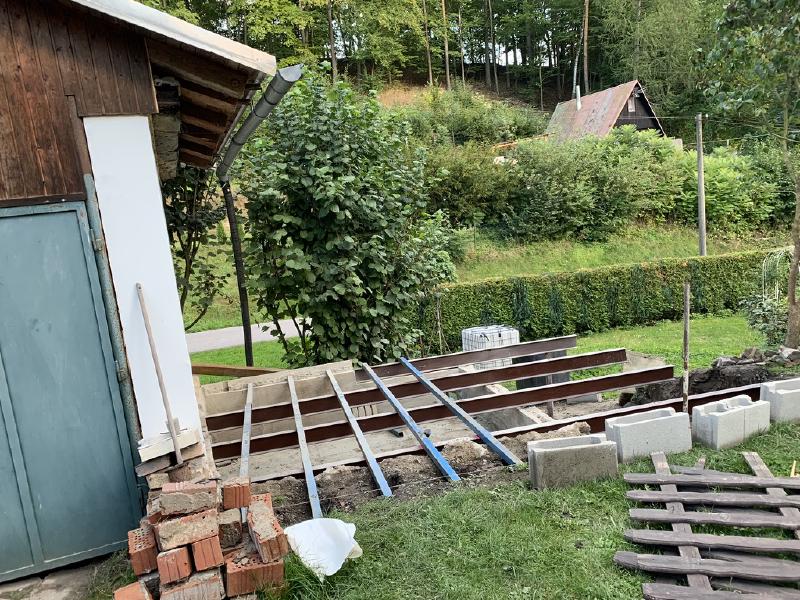
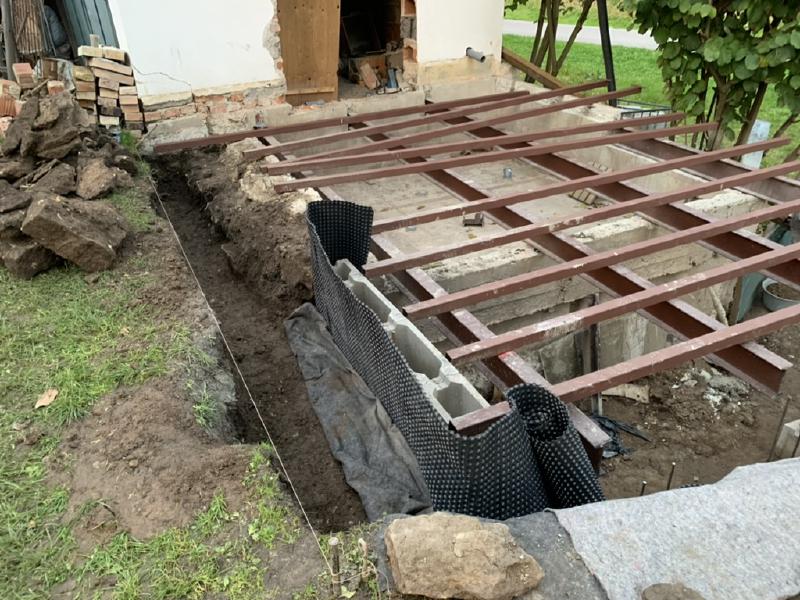
Since the thinner steel beams were “second-hand”, and they came in various lengths, I needed to join them somehow to make them desired lengths. Because I have never held a welding machine in my hands before, the first idea was to reach for some screws, drill some holes and join the beams using screws+nuts. But I quickly ditched the idea, and I was thinking:
Hmmm. I have a house now, so it is just question of time, when will I need to weld something together and my usual screws+nuts approach won’t cut it.
I was always scared of welding, because none of my friends or close family had a welding machine, and I thought it is because it is super hard and expensive to do. Neither of those are (sort of) true.
- I bought my welding machine in lidl (like 99% of my power tools), when it was on discount, so I got it for like 100 EUR.
- I have found out that basic welding is not that hard (Unless some special-type welding is needed, i.e. welding of pressure containers etc.)
So this led me to be brave enough and buy a welding machine + helmet. Later, I found out there is plenty of welding machine types (MIG/MAG/TIG/Flux core…). Fortunately, I found out later after buying - otherwise I would waste another weeks studying and comparing pros and cons of each welding type, because this is just how I usually work prior to any purchase: doing an extensive research. But this time, I fortunately somehow did not need this research at all and I went for Flux core type 😁.
So as a bonus you can see one of the first welding attempts here 🤣
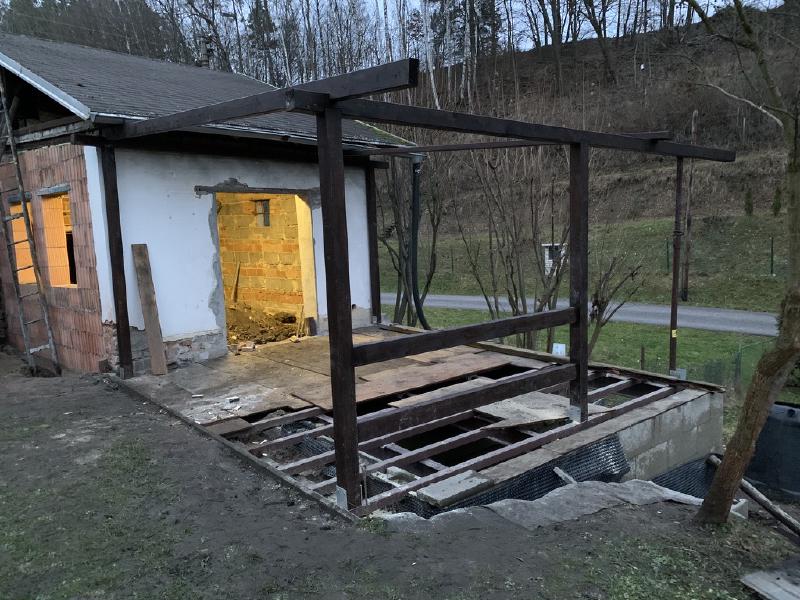
New Roof
The approach was kinda the same as before - learn from the mistakes of the old roof build. So I thought a lot about the future structure of the wooden roof beams. Also, the old roof’s beams was “connected” to the adjacent roof’s beams, and I wanted to avoid this in case I need to fix the adjacent roof. In case the two roofs would be connected, I would need to disassemble the terrace roof too, which would be a lot of work. The next requirement was to make it more sturdy and pretty.
Two weekends was “wasted” by just doing the wooden beams paint job, since there were plenty of them, and me and my dad did two coats of insect+fungus repellent paint. Then it was ready for assembly, which took a lot of ad-hoc cutting. Plus because I wanted extra sturdiness, I connected some beams with mortice+tenon joints instead of screws, which is extra work, but worth it!
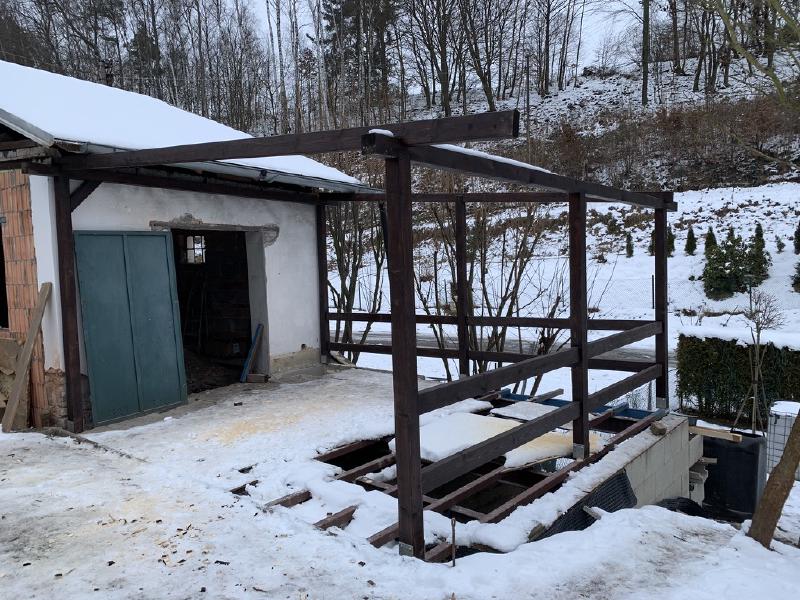
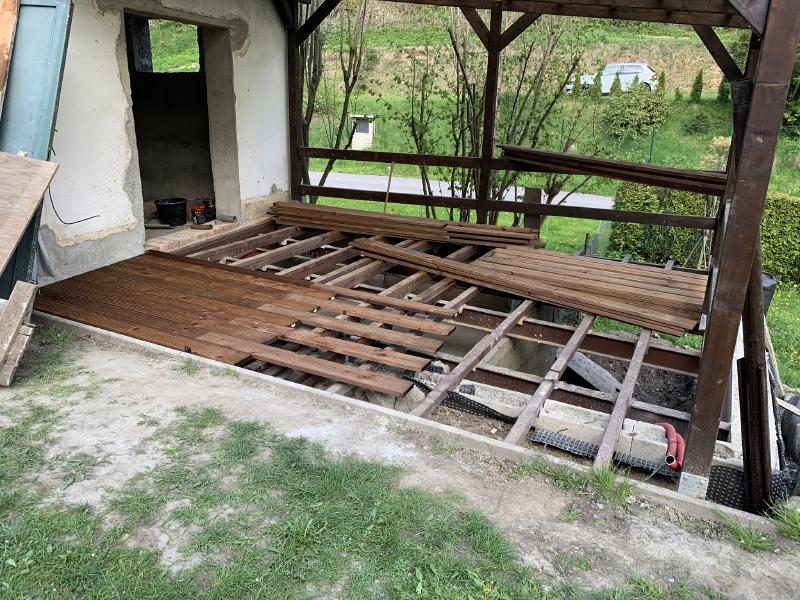
New Flooring
Last and the most rewarding part was to install the flooring. I was looking at the WPC (wood plastic composite) planks at first, because they offer no maintenance (since it’s plastic). But they are more expensive than wood and 1000% uglier than real wood (plus I love wood). So I chose the basic pine planks (the exotic wood is more durable but far more expensive than basic pine). My father-in-law helped me with his big-ass car to get it on the building-site and then with the assembly too, so we have it faster (he is a woodworker, which helps). My parents helped with coating planks with the decking oil, to make it more sun+wear resistant.
Conclusion
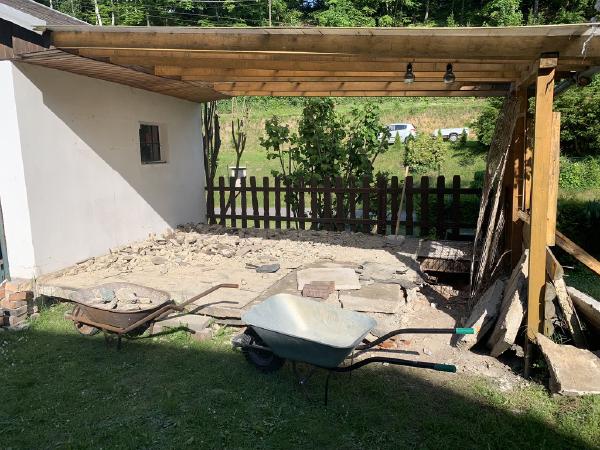
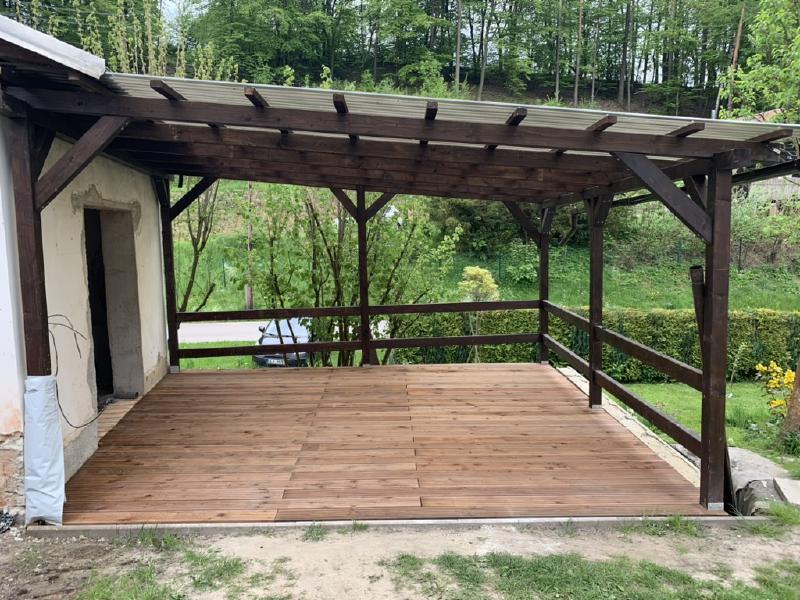
I am pretty satisfied with the result! The next major step is to do build the adjacent outdoor kitchen, which I will present you in tha future, hopefully!
If interested, you can check rest of the posts about house renovation.